Use Javascript to retrieve user avatar image
Discover how to fetch user avatar images and display them using the image widget.
-
Difficulty: beginner
-
Prerequisites: have an application on Bonita UI Builder
Assume we want to extract an image path from our API response and display a user avatar by binding it to an image widget. This can be done by creating a JavaScript function that constructs the URL for the 'icon' parameter.
Example
1. Create an API query
-
Navigate to the
Queriessection, create a new query/API, name itgetUsersand configure as shown in the image below:
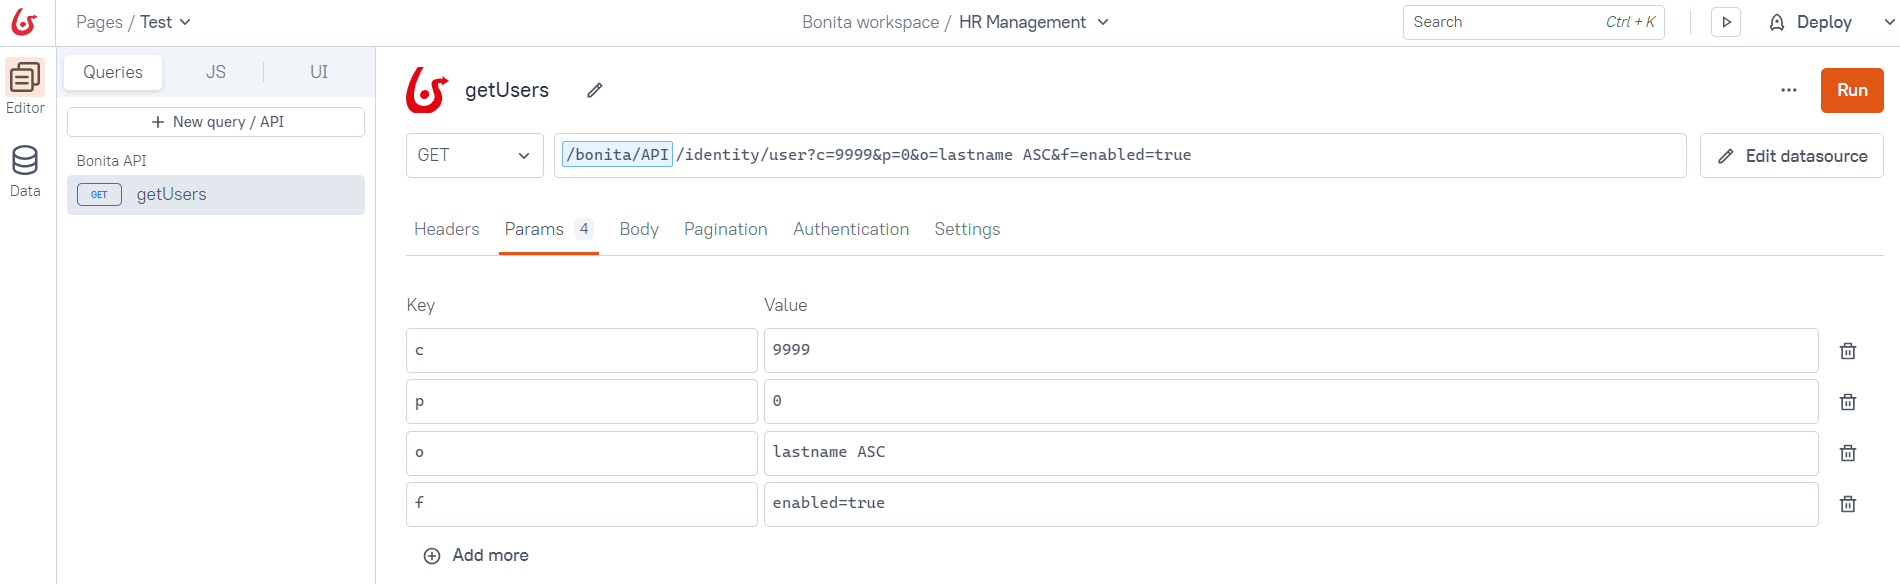
The getUsers query returns a list of users that includes an image path for an avatar icon if available; otherwise, it provides a default user image icon.
2. Create JS functions
-
Go to the
JSsection, create a new JS object nameduserAvatar, and implement the function as provided below:
export default {
    getIconFullURL(icon) {
		let currentDomain = appsmith.URL.protocol + "//" + appsmith.URL.hostname;

		if (appsmith.URL.port) {
			currentDomain += ":" +  appsmith.URL.port;
		}
		return currentDomain + "/bonita/portal-theme/" + icon;
	}
}
The provided code snippet above exports an object containing a getIconFullURL method that builds a complete URL for an icon by combining the current domain’s protocol, hostname, and port with a specified icon path.
It appends the icon path to the /bonita/portal-theme/ directory on the server. This method ensures that the generated URL correctly points to the icon on the same server where the application is hosted.
3. Design the user interface
-
Navigate to the
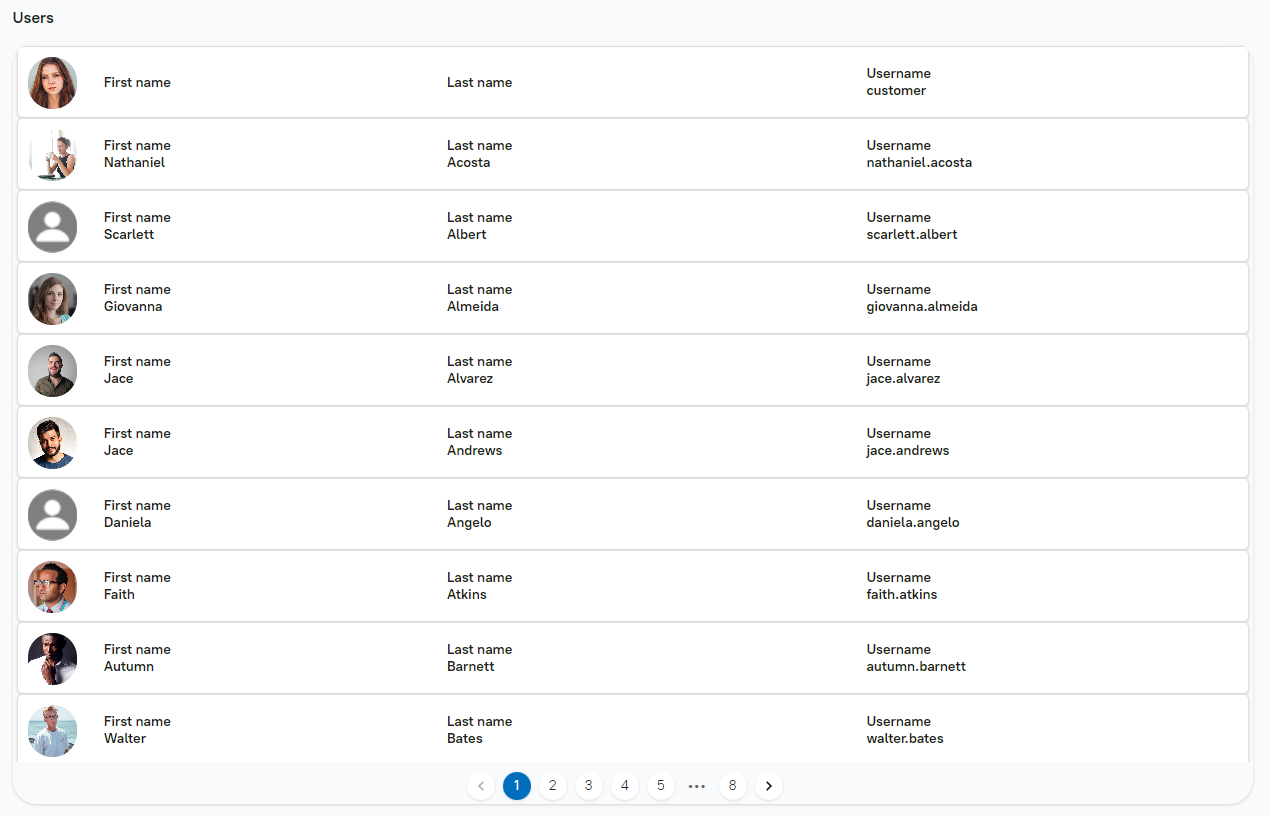
UIsection, drag and drop a text widget onto the interface, and set its text to 'Users'. -
Next, drag and drop a
listwidget onto the interface and bind it to thegetUsersquery that was created earlier:

-
Since the list widget by default includes text widgets and an image widget for each list item, we will use these default widgets to bind the list items.
-
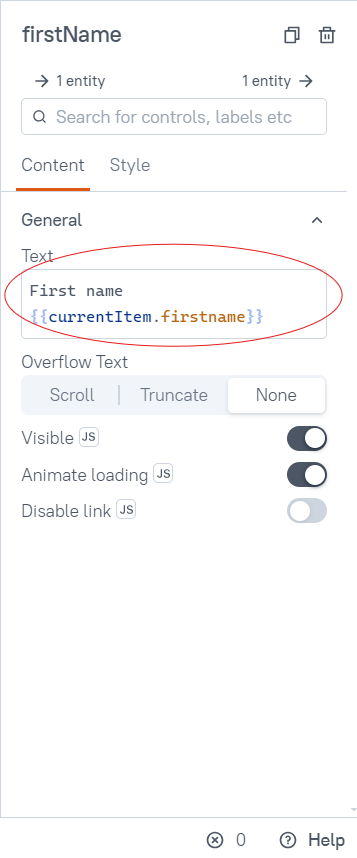
Select a text widget and bind it to the
firstnameof a user in the list. For instance, useFirst name {{ currentItem.firstname }}:
-
Similarly, bind the
lastnameandusernameto the other text widgets. For example useLast name {{ currentItem.lastname }}andUsername {{ currentItem.username }}. -
Now, select the image widget and call the JavaScript function created previously to bind it to the user’s avatar icon. For example, user
{{ userAvatar.getIconFullURL(currentItem.icon) }}:
![]()
|
Feel free to adjust the UI according to your preferences. |