How to install Bonita as a service on Windows
In this tutorial we show how to install Tomcat with Bonita configured as a Windows service.
Software needed
For this tutorial you will need the following softwares:
-
Tomcat Windows service installer
-
Bonita Tomcat Bundle
-
Postgresql Database (or another database supported by Bonita)
Please verify the supported version in Installation/Basic Bonita Platform installation/hardware-and-software-requirements
Download and installation
-
Download apache-tomcat-x.y.exe (32-bit/64-bit Windows Service Installer) from Tomcat website: https://tomcat.apache.org/
|
Download the same apache-tomcat version (visible in Installation/Basic Bonita Platform installation/hardware-and-software-requirements) Choose the "32-bit/64-bit Windows Service Installer" installation. |
-
Install apache-tomcat-x.y.exe. From now on we’ll call the installation path as %TOMCAT_INSTALL_FOLDER%
-
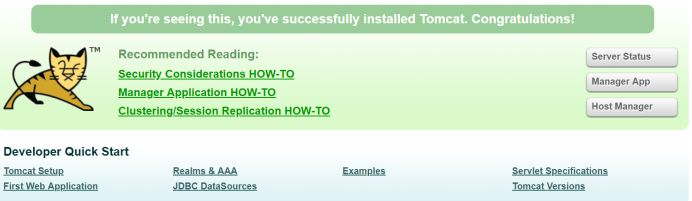
Verify that Tomcat is well installed browsing the following URL: http://localhost:8080
-
Download the bundle BonitaSubscription-VERSION.zip (or BonitaCommunity-VERSION.zip for the community edition)
-
Unzip the bundle in a folder that we’ll call: %TOMCAT_BUNDLE%
Get the license (In case of Subscription edition)
-
Execute
%TOMCAT_BUNDLE%/tools/request_key_utils/generateRequestKey.bat -
Use the generated key to get a license from the Customer Service Center. The license should not be a development license.
-
Move the received license file into the folder
%TOMCAT_INSTALL_FOLDER%/setup/platform_conf/licenses
Database configuration
-
Follow the documentation here to correctly prepare the PostgreSQL database
-
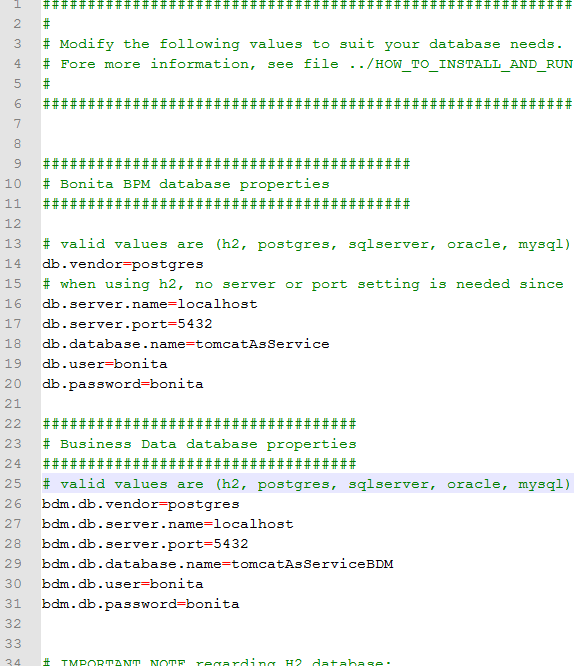
Configure the file
%TOMCAT_BUNDLE%/setup/database.propertiesto point towards the suited database (engine and BDM)
-
Execute the command "%TOMCAT_BUNDLE%/setup/setup.bat init" in order to initialize the Bonita database with the default configuration.
-
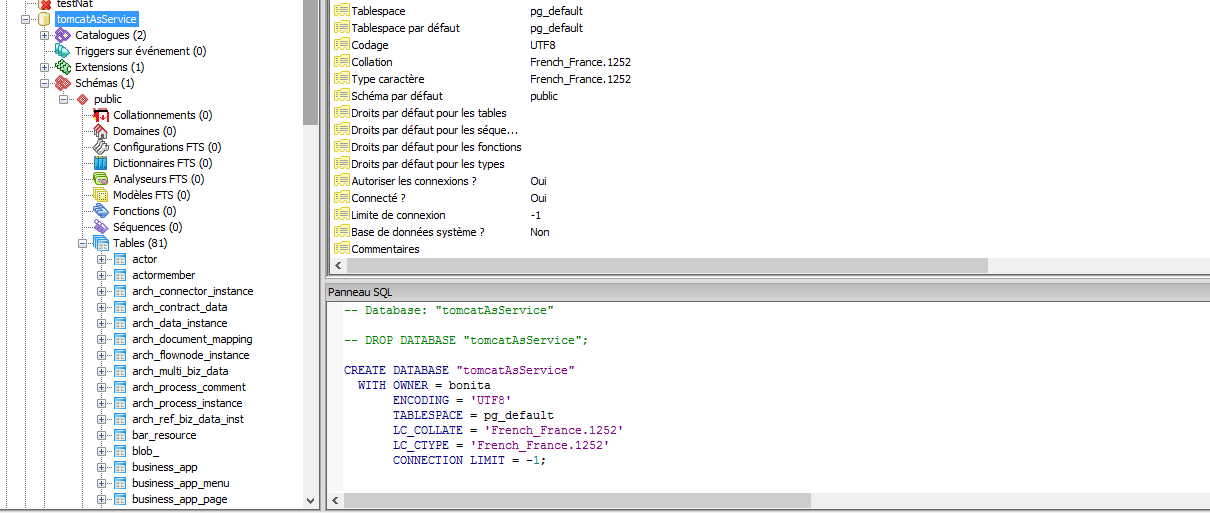
Verify that setup tool properly created the tables in the engine database.
-
Execute the command "%TOMCAT_BUNDLE%/setup/setup.bat configure" in order to configure file in the %TOMCAT_BUNDLE%. Those files will be copied to the tomcat installation.
|
This is an example with Postgres, any database works |
Server configuration
-
Copy the folder %TOMCAT_BUNDLE%/server/lib/bonita to %TOMCAT_INSTALL_FOLDER%/lib
-
Copy the folder %TOMCAT_BUNDLE%/server/conf to %TOMCAT_INSTALL_FOLDER%/conf
-
Copy the application %TOMCAT_BUNDLE%/server/webapps/bonita.war to %TOMCAT_INSTALL_FOLDER%/webapps
Configure JVM properties
-
The file
%TOMCAT_BUNDLE%/server/bin/setenv.batcontains all JVM parameters to use in the new installation. -
The properties should be the following ones:
-
-Dorg.bonitasoft.platform.setup.folder=%TOMCAT_INSTALL_FOLDER%\setup
-
-Dorg.bonitasoft.engine.incident.folder=%TOMCAT_INSTALL_FOLDER%\logs
-
-Dsysprop.bonita.db.vendor=postgres
-
-Dsysprop.bonita.bdm.db.vendor=postgres
-
-Dcom.arjuna.ats.arjuna.common.propertiesFile=%TOMCAT_INSTALL_FOLDER%\conf\jbossts-properties.xml
-
-Dfile.encoding=UTF-8
-
|
Replace the |
where we replaced the %CATALINA_HOME% with our new Tomcat directory
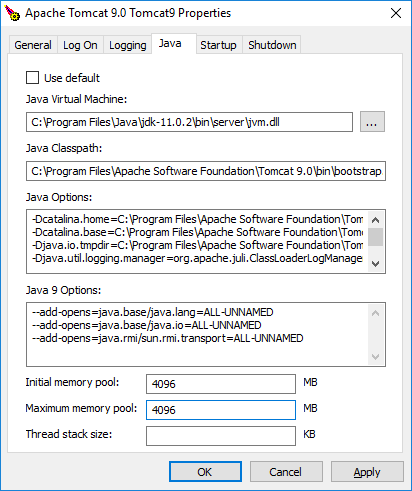
In order to apply these configurations to the new installation, you have to use the program %TOMCAT_INSTALL_FOLDER%/bin/TomcatXw.exe (Where X is the Tomcat major version ), and replicate them in the Java Options field.
|
This is not a command line.
|
Then for example
-Dorg.bonitasoft.platform.setup.folder=C:\Program Files\Apache Software Foundation\Tomcat 9.0\setup
-Dcatalina.home=C:\Program Files\Apache Software Foundation\Tomcat 9.0
-Dcatalina.base=C:\Program Files\Apache Software Foundation\Tomcat 9.0
-Djava.io.tmpdir=C:\Program Files\Apache Software Foundation\Tomcat 9.0\temp
-Djava.util.logging.manager=org.apache.juli.ClassLoaderLogManager
-Djava.util.logging.config.file=C:\Program Files\Apache Software Foundation\Tomcat 9.0\conf\logging.properties
-Dorg.bonitasoft.platform.setup.folder=C:\Program Files\Apache Software Foundation\Tomcat 9.0\setup
-Dorg.bonitasoft.h2.database.dir=C:\Program Files\Apache Software Foundation\Tomcat 9.0\h2_database
-Dorg.bonitasoft.engine.incident.folder=C:\Program Files\Apache Software Foundation\Tomcat 9.0\logs
-Dsysprop.bonita.db.vendor=postgres
-Dsysprop.bonita.bdm.db.vendor=h2
-Dcom.arjuna.ats.arjuna.common.propertiesFile=C:\Program Files\Apache Software Foundation\Tomcat 9.0\conf\jbossts-properties.xml
-Xshare:auto
-XX:+HeapDumpOnOutOfMemoryError
-Dfile.encoding=UTF-8
is correct
-
Setup
%TOMCAT_INSTALL_FOLDER%/bin/Tomcat9w.exe -> Java-> "Initial memory" with a proper value based on your hardware and project requirements. -
Do the same with "Maximum Memory pool" property. As an example, if your Operating system has 8 GB of ram you could setup Initial Memory Pool = Maximum Memory Pool = 4096.
-
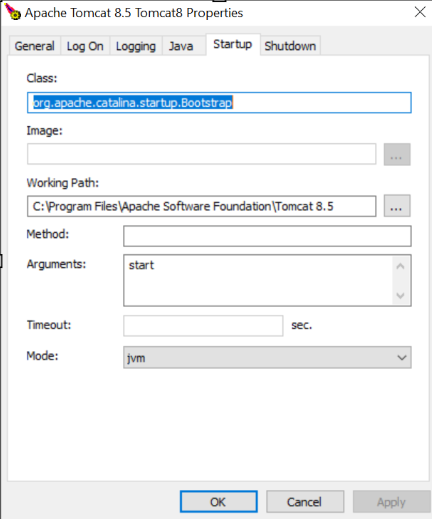
Verify that in the Startup tab the "Mode" property is set to "Jvm".
System restart and test
-
Restart the Tomcat service to take in account the new updates.
-
Verify that the Bonita platform is available at the following address: http://localhost:8080/bonita
-
Connect with the technical user (default install/install) and do some tests:
-
Add an organization.
-
Assign profiles to users.
-
Deploy a simple process and test its execution.
-