Bonita Administrator Application overview
Value
Bonita Administrator Application allows anyone with the Administrator profile to manage the use of Bonita throughout a department or a company.
It allows to monitor process execution, troubleshoot and fix errors, manually install and update processes, organization, BDM access rights, resources, and applications, and access information about the license and subscription.
Most of these pages are common with the Bonita Super Administrator Application, because they allow to manage the content of the automation project on Bonita Runtime.
Only the monitoring and management of processes is special to the Administrator Application.
|
Most updates at runtime should be performed through a change in the project sources, to create a new project version. What the Administrator Application allows are emergency changes to recover from an urgent issue. All changes performed through this application or any similar application allowing changes in the automation project elements must be backported to the project sources and versioned. |
Status
This application is a generic example provided by Bonita. It is embedded in the Runtime and can be used as is.
But it can also be downloaded from Bonita Studio to be part of your automation project and be totally customized.
If you do not need this application at runtime, you can delete it from the Super Administrator Application or any custom application granting this right.
Access during Development and Testing phases
To access the application:
-
Open Bonita Studio
-
Click on the Applications icon of the coolbar. The default application is the Application Directory. You will be logged in as the default user of the deployed organization.
This default user can be changed by opening the organization editor.
By default, in our provided ACME organization, the default user is Walter Bates, logged as "walter.bates", with password "bpm". -
In the Application Directory, select Bonita Administrator Application
You are now logged in the Bonita Administrator Application.
To access its content:
-
From the Bonita Administrator Application menu, click on "Applications"
-
On the "Bonita Administrator Application" row, click on the "…" View application details icon
Access in Non-Production and Production environments
To deploy the applications into a bundle or the Cloud, you can use Bonita Continuous Delivery (for Bonita Subscription and using BCD). Alternatively, you can deploy an application by importing all its components in the following order:
-
Organization then profiles
-
API extensions then pages, layout, themes
-
Business Data Model then processes
-
Application descriptor
Once deployed, log into Bonita and navigate to the application through the Application Directory.
Create your own Administrator application from ours
Creating your adminstrator application based on Bonita Administrator Application means that you can change some of its existing pages, its navigation, its logo, its layout and/or its graphical theme and make those changes visible in the application descriptor.
Import it in Bonita Studio
From Bonita Studio Welcome page Resources tile, click on "Import Bonita Admin Application".
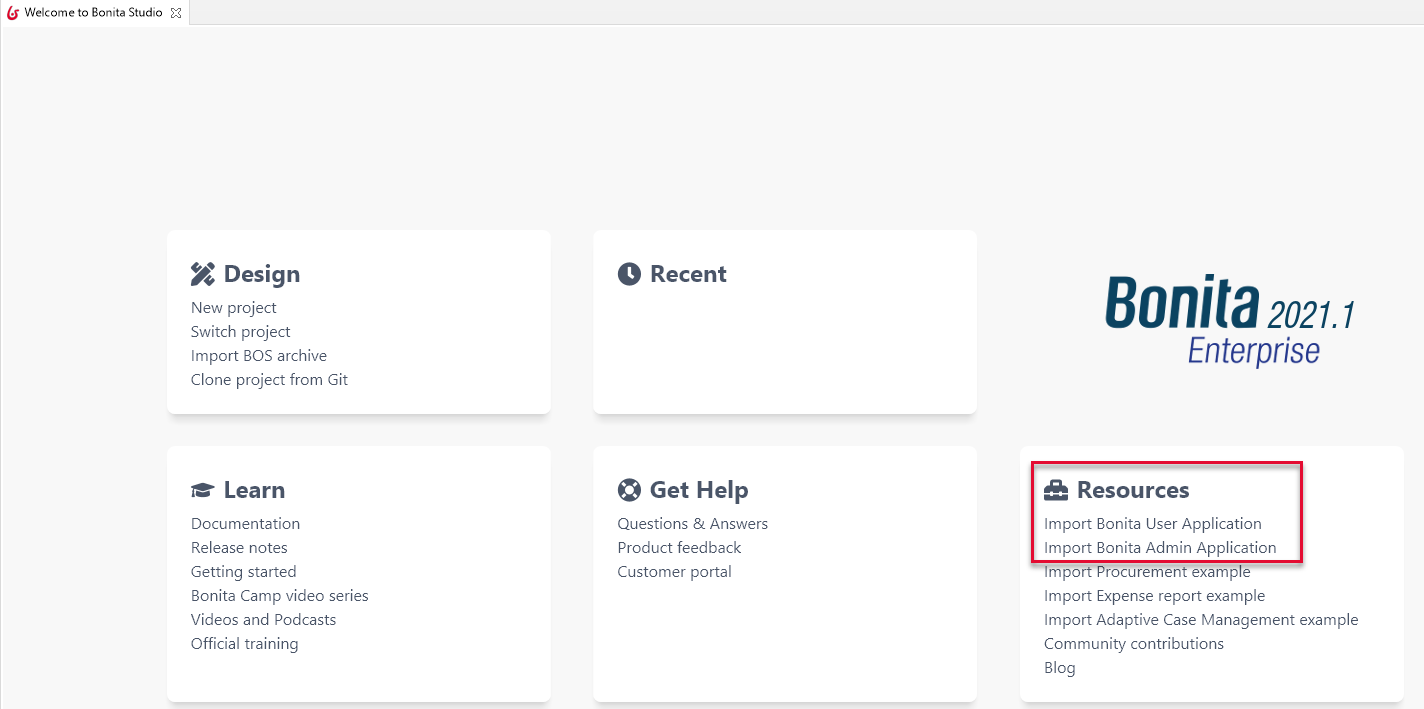
You can also get it from our Admin Application GitHub repository.
There are two ways to get the .bos file. You can either get it from the Releases on the right or by cloning the repository of your choice and building it using maven.
Building the repository will create a .bos file in the target folder. You can then import it into the development environment.
Using this method is also useful if you want to get an older version of an application or if you need a weekly version with a potential bugfix.
After validation, the application is imported or cloned; you can view its content in the project explorer, deploy it, and open it.
Change the existing pages
-
In the studio’s Project Explorer, select the page to customize.
-
All pages previously created using Google Web Toolkit framework have been recreated with Bonita UI Designer. They can be customized in the UI Designer. They come with the Administrator Application you have downloaded from Bonita Studio. You will see them in the Project Explorer.
-
All pages previously created in other, more recent technologies, have been wrapped as custom pages. They cannot be customized in the UI Designer. Since they cannot be imported in a .bos archive, they do not come with the Administrator Application you have downlaoded. Instead, they come as provided resources. You can find them in the "Resources" tab of the application.
-
-
Double-click on the page. It opens in the UI Designer. You can start editing the page.
-
Save it when you are done. Save it as another page if you need to keep Bonita’s original page for further use.
Saving in the UI Designer makes the new page available in Bonita Studio.
Change the navigation menu
-
Get all the application’s pages available:
-
If you have created new pages in the UI Designer and saved them, they are ready to be used in an application menu.
-
If you have created new pages in another IDE, go to the Resources menu option of the Administrator application, and Install your pages. At deployment time, since these external resources are not part of the project, make sure you also deploy them.
-
-
In Bonita Studio, go to the "Project Explorer" on the left and double click on the "bonita-admin-application.xml" application descriptor for Community, or "bonita-admin-application-sp.xml" for Enterprise.
-
In the editor, change the order in the menu, remove the pages you do not need, add other Bonita provided pages, and/or add yours, either in the menu or as orphan pages.
Orphan pages are not visible in the menu, but can be accessed through the navigation from another page, like a case details page is accessed through a case list.
|
Make sure Bonita provided "details" pages are always used as orphan pages, as they need some parameters (usually just an ID) to be passed in the URL by a list or another page to show any content. |
Change its logo
|
Changing an application logo can only be done in Bonita Super Administrator or Administrator applications, and not in Bonita Studio. |
-
Create the new logo. Supported formats/extensions are: png, jpg, jpeg, gif, bmp, wbmp, tga. Maximum size: 100 KB
-
Go to the application details: Applications icon in the coolbar > "Administrator application > "Applications" menu > "…" icon for Bonita Aministrator application.
-
Click on the "Upload new picture" button below the current logo
-
Select the new logo
The new logo is applied.
Change its layout
|
So far, the Bonita Administrator Application is mostly thought for desktop and laptop screen sizes, as we believe this is the most likely screen sizes to be used to administrate Bonita. If you target mobile usage, you may need to rework the widgets display in the UI Designer in the application pages, but Bonita default layout is made to adapt to a mobile screen size. |
-
Create a new layout and make it available like a page (UI Designer or Resources if created in another IDE)
-
In the Look & Feel section of the application descriptor, clear the current layout content
-
Start typing the name of the layout
-
Select the new one from the autocomplete list
-
Save the application descriptor
The new layout is applied.
Change its theme
-
Create a new theme
-
Go to the Administrator application > Resources
-
Install the new theme
-
Go back to the application descriptor
-
In the Look & Feel section, clear the current theme content
-
Start typing the name of the theme
-
Select the new one from the autocomplete list
-
Save the application descriptor
The new layout is applied.
At deployment time, since these external resources are not part of the project, make sure you also deploy them.
|
Once a page has been customized, or when the Administrator application has been customized, it is no longer supported. |
Login and sign out
To know more, go to the dedicated page.
Language selection
To know more, go to the dedicated page.
Navigation between applications
To know more, go to the dedicated page.