Create an application
The last step of this Getting Started tutorial is to create an application.
To create and deploy an application in your local environment, use the Application descriptor. This editor defines the skeleton of an application, as it contains references to resources installed in Bonita Portal and used by a given application. It will also help deploy the application directly from Bonita Studio.
The page you have created in the UI Designer, as well as the forms, have been automatically added to project resources under Pages/Forms/Layout.
To create the application, add a new application descriptor:
-
In the Bonita Studio menu click on
-
A guidance pop-up appears. Click on OK
-
Click on Add a new application descriptor. In the pop-up window, type claims in the Application Token field, and Claims as Display name.
The applicationDescriptorFile.xml is initialized and the editor will help you create the application directly from Bonita Studio.
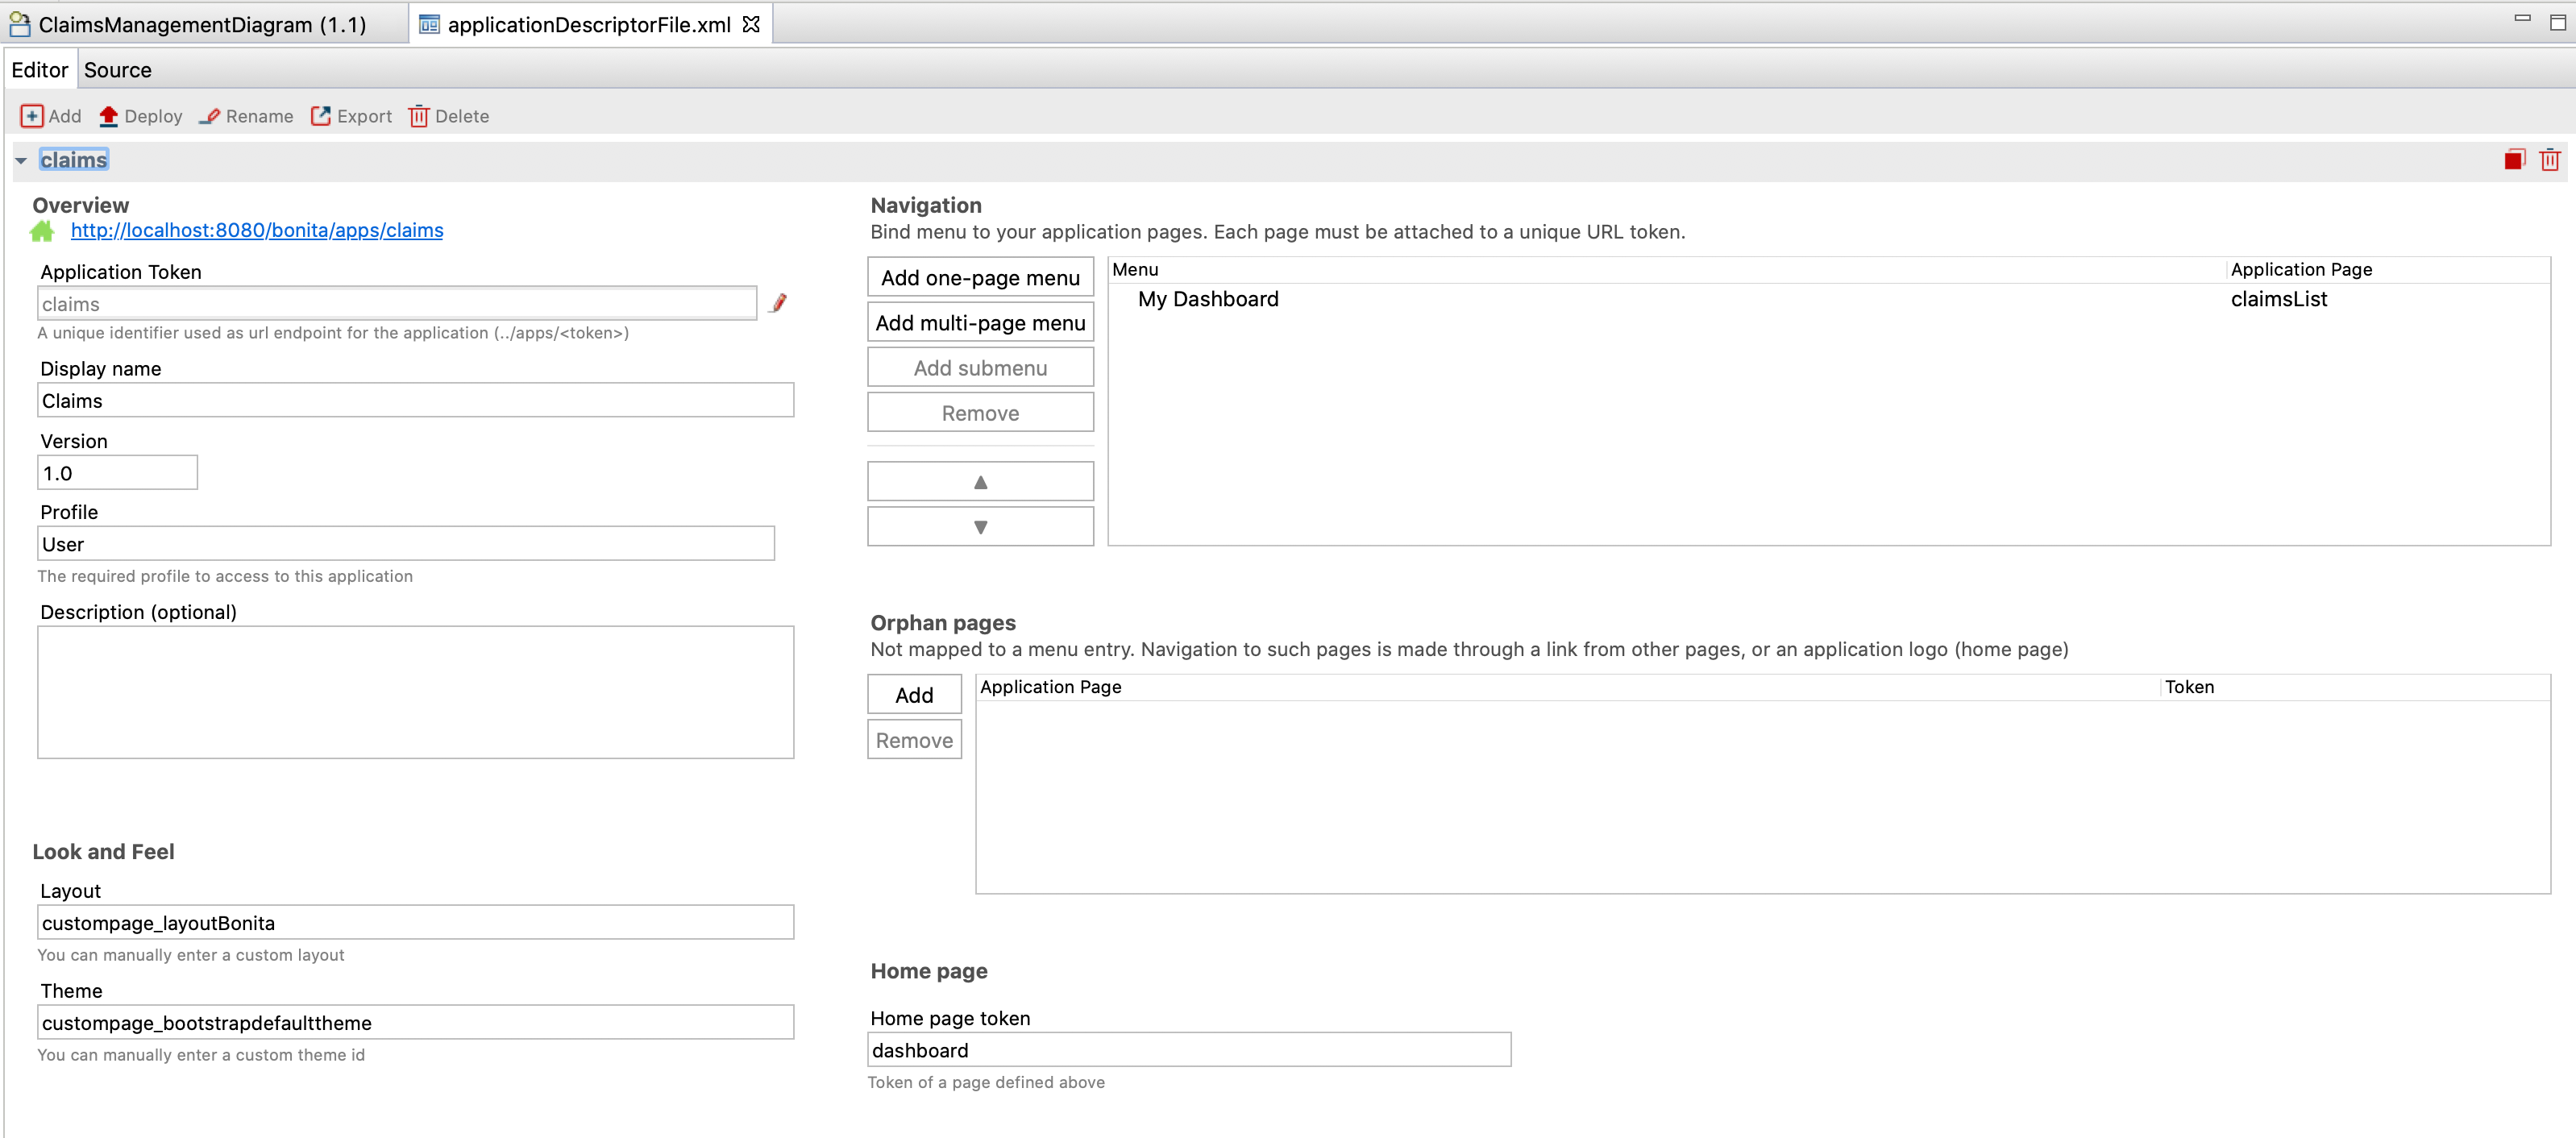
To create an application, you have to define:
-
The application token
-
The application name
-
Which profile will have access to the application
-
The menu and pages of our application
-
The homepage
-
Click on the button Add one-page menu under Navigation section.
-
Type My dashboard in the column Menu
-
Type the page name claimsList in the column Application page
-
Enter dashboard in the column Token
-
The application is ready to be deployed in Bonita Applications. Now you need to deploy it in Bonita Applications:
-
Click on the Deploy icon

-
Click on Select all to make sure everything is deployed: test organization, business data model, process definition, application page
-
Make sure that Clean BDM database before deployment is not checked as you want to keep your data for testing
-
Click on Deploy
-
In the Deploy status pop up window, click on Close
Congratulations! You have successfully created your first process and your first application with Bonita.
|
Confirm that the application is available :
|
To learn more about Bonita components and concepts, we recommend the Bonita Camp tutorial. Of course the official documentation is also a great place to learn more about Bonita. If you prefer to learn from examples, you can find several on the community website. And finally, remember that you can always get help and ask questions of the Bonita Community.