Input widgets
Use an input widget to enable a user to provide input. In addition to the general widget properties, all input widgets have the following:
-
A Required property which prevents button from being clicked when put inside a form container
-
A Read-only/disabled property which prevents the user from modifying the value
-
A Label (which can be hidden)
-
A property to specify whether input is mandatory
-
A Value property that is used to capture the value entered by the user.
The sections below describe the available input widgets.
Plain input widget

There are four types of input:
-
text: a free-form text field
-
email: an email address
-
number: a decimal or integer number
-
password: like text but each character is replaced by an asterisk.
Currency input widget
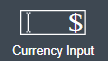
Use the currency input widget to input or display financial data.
The widget is flexible enough to allow any currency, tune the number of decimal digits, choose the symbol position.
Decimal and thousands separators can be also fine-tuned.
Text area and rich text area widgets

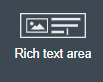
Use the text area input widgets on a form or page to collect large text.
The rich text area allows the user to format and style their input, add images, links, and so on.
You can customize the toolbar for the end-users by selecting options among the available values of the toolbar properties.
Autocomplete widget
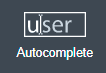
Use an autocomplete widget to offer the user a list of possible values based on data entered in the field. For example, in a firstName field, if the user types chri, the values chris, christine, christian, christiane are proposed. The user selects the correct value. To define the available values, bind a data source to initialize the suggestions. For suggestions that are an array of objects, you can specify a displayed key to identify the attribute to show as a suggestion in the widget. The value must be bound to a variable that will hold the selected suggestion.
See Troubleshooting UI Designer widgets to solve common issues with this widget.
Select widget

Use a select widget to offer the user a drop-down list of values. The user selects the required value.
The available values property is used to populate the list of available values. Alternatively for simple data, you can provide a comma-separated list of values (for example, red, green, blue).
You can also use data binding and specify a variable to populate the list of available values. In this case, specify a label key, which identifies the attribute to be displayed in the widget.
Checkbox widget

Use a checkbox widget to create a unique checkbox. The value property will be true or false, depending on the checked value of the checkbox.
Checklist widget

Use a checklist widget to create a set of checkboxes for the available values, from which the users picks any number of values. To define the available values, you can provide a comma-separated list for simple values (for example: red, green, blue), or bind to a variable that holds an array of values.
If the values are JavaScript objects, you can also specify a displayed key that identifies the attribute to be used to label the checkboxes and a returned key so selected value will return only a specific key rather that the whole corresponding object.
The selected values are captured through the Selected values property.
| Do not bind the Selected values property to a specific item from the available values collection because selected values will be updated each time you modify a checkbox. Do not bind the Selected values to the Available values collection, because this could lead to unexpected behaviors. |
Radio buttons widget

Use a radio button widget to create a set of radio buttons for the available values, from which the user picks one value.
To define the available values, you can provide a comma-separated list for simple values (for example: red, green, blue), or bind to a variable that holds an array of values.
If the values are JavaScript objects, you can also specify a displayed key that identifies the attribute to be used to label the radio buttons and a returned key so selected value will return only a specific key rather that the whole corresponding object.
The selected value should be bound to a variable that will hold the data for the chosen radio button.
Date picker widget
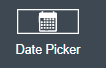
Use a Date picker widget to display a calendar from which the user can select a date or set a date manually (e.g., a date of birth).
To select a date and a time (e.g., to schedule a meeting), use the Date time picker widget instead.
The Date picker widget supports the following types for its Value property as input:
-
ISO 8601 String variables (with or without time information)
-
Date objects
-
Long number values (Milliseconds since epoch)
However, the output of the widget is always a Javascript Date object. So it will change the type of the variable bound to the widget Value to a Date object when the user selects a date. This is required in order to ensure backward compatibility for pages designed with older UI Designer versions.
When sent in the JSON body of a request, the Date object is serialized into an ISO 8601 formatted String variable with the time set to midnight UTC (e.g., 2016-12-31T00:00:00.000Z).
You can configure the displayed date format using a pattern, using yyyy for year, MM for Month, dd for day.
Use the Today button to select automatically and quickly the current day.
For more information about supported formats, read the Angular documentation for date filter.
For a detailed example using the Date picker widget, you can consult the following Howto: Manage dates and times in BDM and User Interfaces.
The calendar can be localized with the usual localization mechanism (localization.json file).
Date time picker widget
Use a Date time picker widget to display a calendar from which the user can select a date and a time or set them manually (e.g., to schedule a meeting).
To select only a date (e.g., a date of birth), use the Date picker widget instead.
Date and time can reflect the user time zone (e.g., a meeting day and time) or be absolute, identical everywhere (e.g., opening hours of a store somewhere). This is controlled by the property Handle time zone.
The input/output of the widget (its Value) is an ISO 8601 formatted String variable (e.g., "2016-12-31T16:30:00.000Z").
You can configure the displayed date format using a pattern, using yyyy for year, MM for Month, dd for day, HH or h for hours, mm for minutes, ss for seconds.
Use the Today and Now buttons to select automatically and quickly the current day and time.
For more information about supported formats, read the Angular documentation for date filter.
For a detailed example using the Date time picker widget, you can consult the following Howto: Manage dates and times in BDM and User Interfaces.
The calendar can be localized with the usual localization mechanism (localization.json file).
File upload widget
Use an upload widget to perform a file upload (POST) on the specified URL. Data returned by the server is stored in the value property.
Button widget

Use a button widget to enable to user to trigger an action. The button can perform a PUT, POST, GET (from 7.1.3), or DELETE (from 7.1.3) request and send data to a given URL.
You can use a variable to hold the resulting data after success or failure.
For pages that are displayed in a task or process context, the button widget can be used to submit a form, completing the human task or starting a process instance. For form submission, you need to define only the data to send. The URL is extracted from the context. When using the Submit task action, you can choose to automatically assign the task to the current user. It will assign and execute the task in a single action.
|
The Tasklist of the Bonita User App does not take that property into account and it is still required to |
Another possible use of the widget button is to add or remove a data from a given collection.
Finally, you can use a button to open a modal container (pop up window) on the page, as long as the modal ID is specified into the appropriate field. Another action for the button widget is to close the modal that contains it.
Every action, except for the Close modal, can close the modal when it succeeds. Setting the Close modal on success property to yes is enough for this to happen.
When inside a form container, the button is automatically disabled while the form is invalid.
Save button widget

Use the Save button widget to store data in the browser LocalStorage. For instance, to let users save the draft of the current form, bind the formInput variable of your form to the value property. A single entry will be created in the LocalStorage identified by the form URL.
Whenever this form is reloaded, either by hitting F5 or browsing away and back again, the entry will be reloaded automatically from LocalStorage.
| The LocalStorage entry will automatically be deleted when the form is finally submitted. |