Design an application page
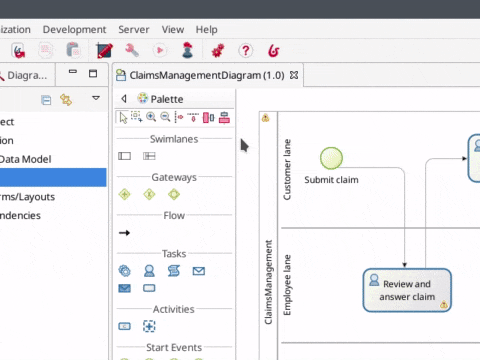
So far, with a process, data, forms, and connectors, we’ve built a fully functional software solution to manage claims. But what if you need to have a dashboard showing all ongoing claims? Such a dashboard is not a process. You should not have to "start" it in order to view it.
A Bonita application is the answer. The first step to build such an application is to create pages.
|
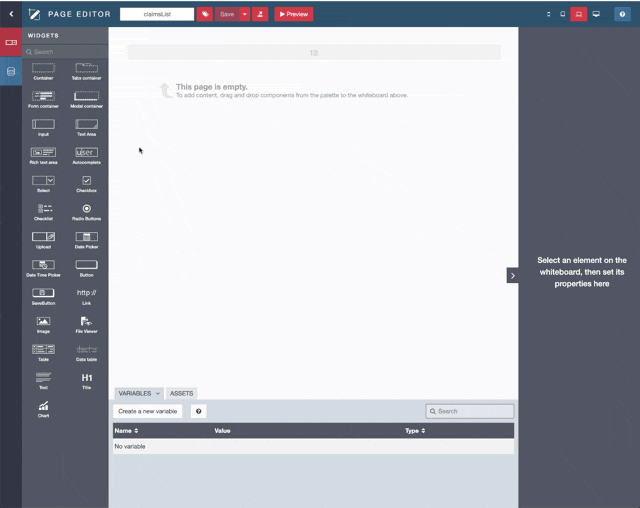
Pages in Bonita are a lot like forms. They are created with the UI Designer with the same sets of widgets. The main difference is that they are not bound to a process definition (like instantiation forms and user tasks forms). An application page can display business data values, charts and even let the user start a process or execute a task by displaying the appropriate form. |
For this example, we will build a basic page that displays, in a table, all the claims that have been submitted. To create a new page:
-
Click on the UI Designer icon
 in the Bonita Studio tool bar
 -
Ignore the information message pop up window
-
Click on Create
-
Make sure that Application page is selected
-
Type the name: claimsList
-
Click on Create
On the new page, using the data management capabilities, the UI Designer can automatically create variables to retrieve business data and generate the user interface:
-
In the top left corner of the UI Designer, click on Data model

-
In the list of business objects, select the Claim object and drag and drop it into the empty space of the page
-
In the popup window, change Variable name from claim to claims
-
In Additional queries, select find
-
Click on Save
The UI Designer automatically created 2 variables which will be used to retrieve and display business data in the application page:
-
claimof type Business data -
claim_selected`of type String which returns the list of claims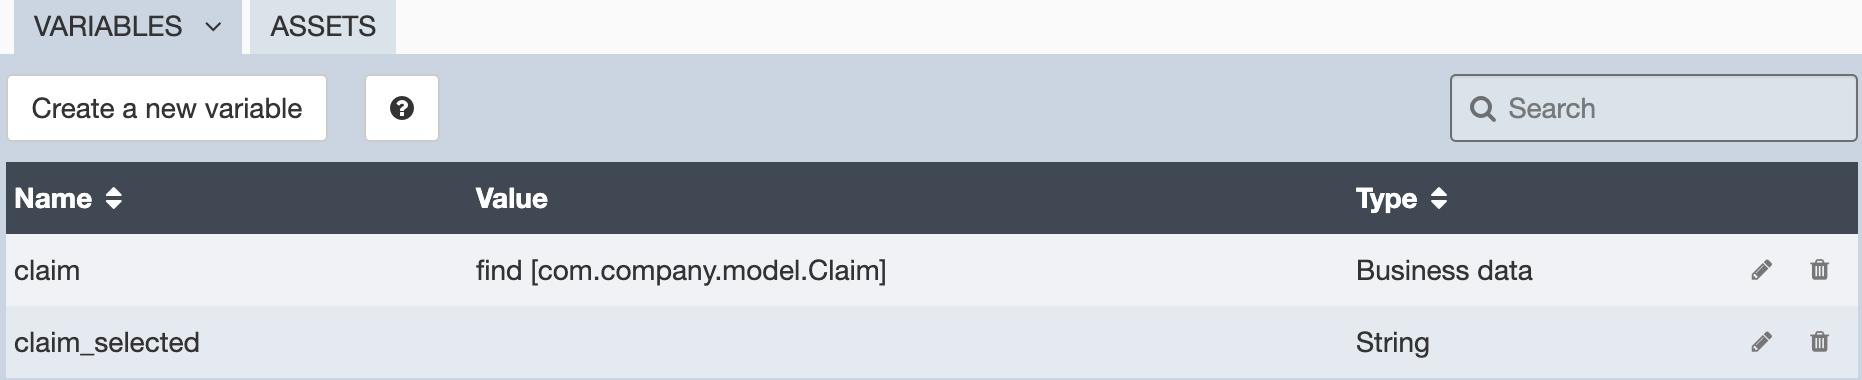
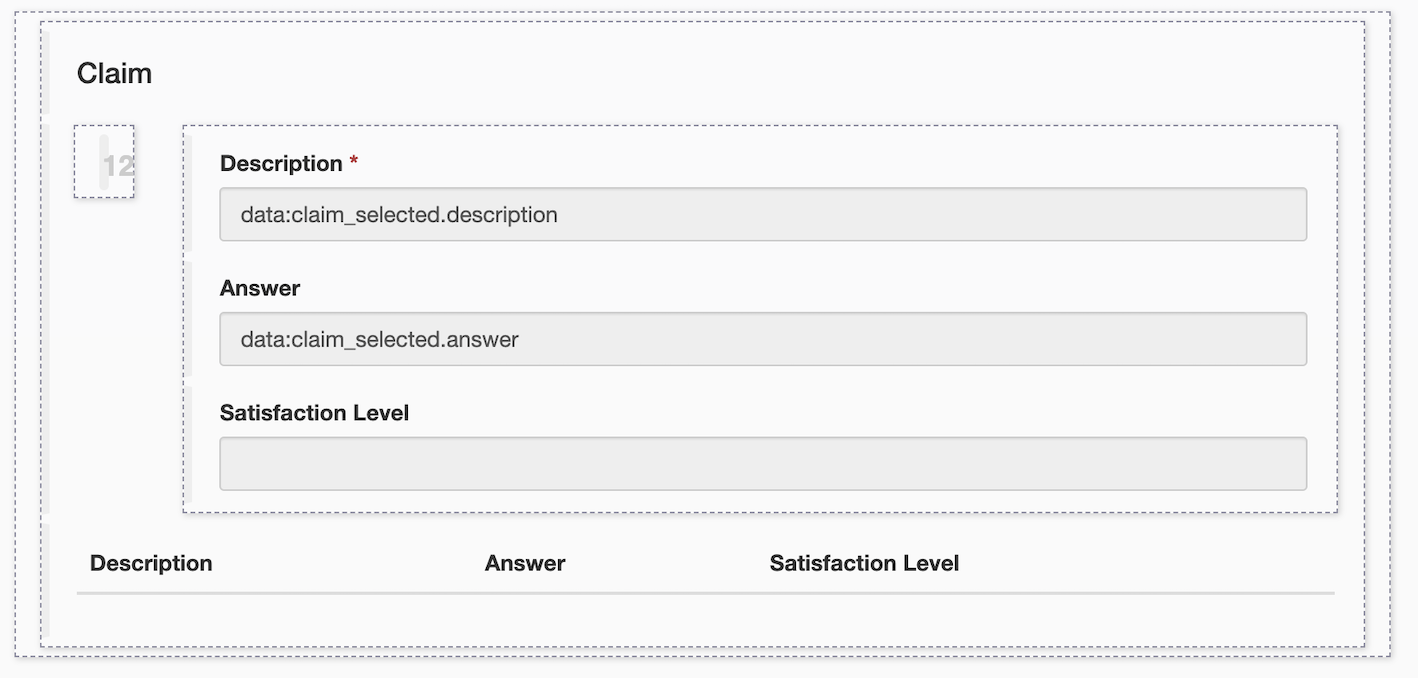
A dashboard page is also automatically generated in the whiteboard. It follows the master/details pattern using containers:
-
A Table widget is displayed with all the instance objects, and the details are shown when a line is selected.
-
The details section maps each Business Object attribute to a corresponding widget (for instance, an Input widget for an attribute of type String)
-
Click on Save in the UI Designer
-
Click on Preview to get a preview of your page
-
|
In order for preview to access the data, a user needs to be logged into the Bonita Runtime. You can click on Applications in the Bonita Studio toolbar to make sure a user is logged in. |
The preview should look like this:

Now you have your first application page. It’s time to move to the next chapter and create the application that will include the page.