How to make a contract with a multiple attribute
Learn how to make a contract with a multiple attribute.
-
Difficulty: intermediate
-
Estimated time: 20 minutes
With Bonita, in the BDM (Business Data Model), you can create an object with a relationship with another object.
For example, a Provider object may have a relationship with a Contact object.
Then, you can create a Process contract with a contact attribute set as multiple,
to specify that you may have several contacts for a provider.
To start a Process Instance, the UI should allow users to create a new provider and add multiple contacts.
In this guide, we will focus on how to create a list of contacts, and store them in a JSON object.
This will be used to fill the contact attribute in the contract.
Create a JS Object to manage the list of contacts
Go to the JS tab and create a new JS Object called ContactsHandler and copy and paste the following code:
export default {
	contacts: [{id: 0, title: "Mr", firstname: "Alejandro", surname: "Dupont", email: "alejandro@dupont.com", contactType: "technical"}],
	maxId: 1,
	getAll () {
		return this.contacts;
	},
	add(contactToAdd) {
		if (!contactToAdd) {
			showAlert("Invalid contact!");
			return;
		}
		contactToAdd.id = this.maxId++;
		this.contacts.push(contactToAdd);
		this.getAll();
	},
	delete(idToDelete) {
		if (idToDelete === undefined) {
			showAlert("Invalid id!");
			return;
		}
		this.contacts = this.contacts.filter(contact => {
			return contact.id !== idToDelete;
		});
		this.getAll();
	},
	update(contactToUpdate) {
		  const index = this.contacts.findIndex(contact => contact.id === contactToUpdate.id);
		if (index === -1) {
			showAlert("contact not found! id=", contactToUpdate.id);
			return;
		}
		this.contacts[index] = contactToUpdate;
		this.getAll();
	}
}
This simple code allows creating, updating and deleting contacts.
Now, from the Settings tab, enable Run on page load for the getAll function.
Create a UI to manage the list of contacts
-
Drop a Table widget on the page
-
Set the
Table dataproperty asJSand as{{ContactsHandler.getAll.data}} -
For the Columns, check the
Editableproperty, and uncheck theidcolumn, since it is automatically generated
Enable adding a row
-
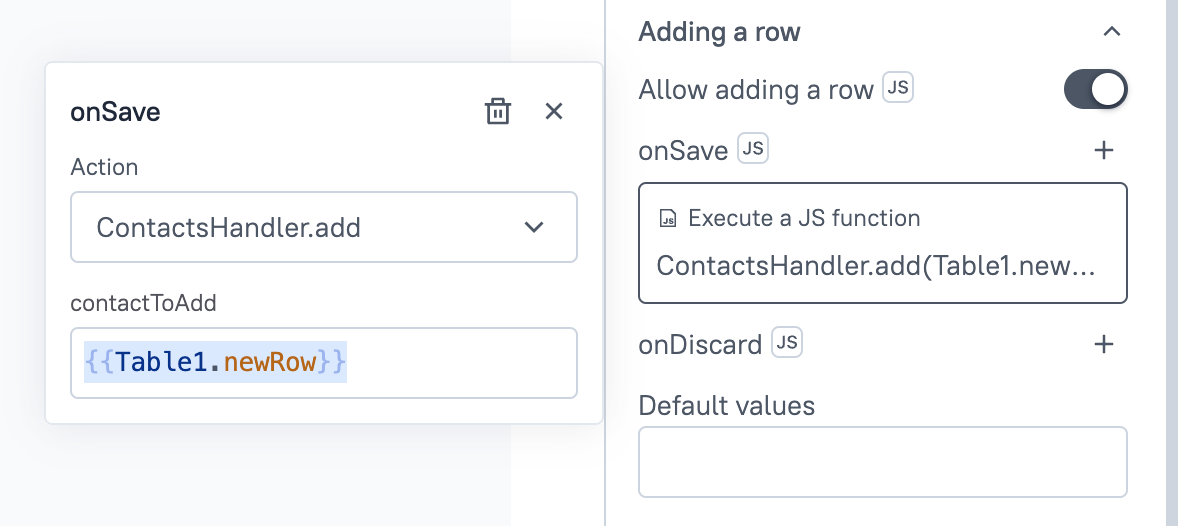
In the
Adding a rowsection:-
enable the
Allow adding a rowproperty -
Set the
onSaveproperty toExecute a JS function→ContactsHandler.add(data)with{{Table1.newRow}}parameter:
-

-
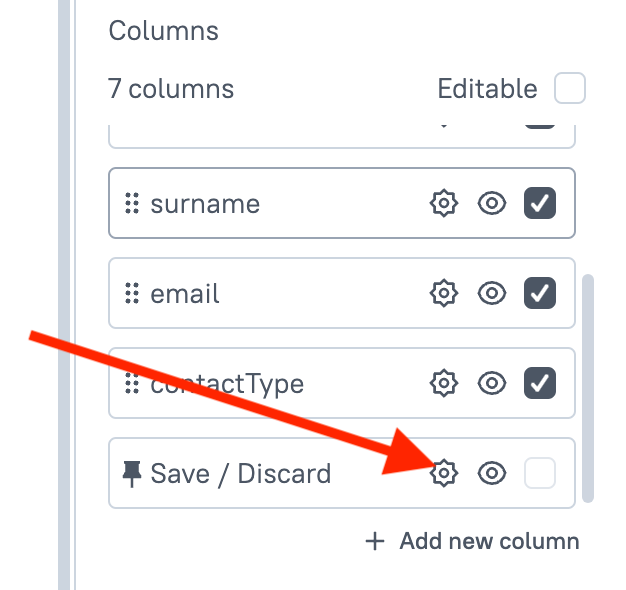
From the
Columnssection, click on theSave / Discardspin wheel icon to edit the column properties -
Set the
onSaveproperty asJSand as{{ContactsHandler.update(Table1.updatedRow)}}:

-
Set the
Titlecolumn type asSelectand set theOptionsproperty as:
[{"label": "Mrs", "value": "Mrs"}, {"label": "Mr", "value": "Mr"}]
-
Set the
ContactTypecolumn type asSelectand set theOptionsproperty as:
[{"label": "Administration", "value": "administration"}, {"label": "Technical", "value": "technical"}, {"label": "Other", "value": "other"}]
Add a button to delete a row
-
Add a
deletecolumn to the table -
Edit the column properties:
-
Set the
Column typeasIcon button -
Set the
Iconproperty asdeleteicon -
Set the
onClickproperty toExecute a JS function→ContactsHandler.deletewith{{Table1.triggeredRow.id}}parameter -
You may also want to set the icon color as red, from the
Styletab
-
You can now play with your UI by adding, updating and deleting contacts!